User posts Will Welker
22 June 2017 05:47
On the Show and Hide nodes it would be cool to have a time parameter like what you have on the Move Object nodes so you could fade in and fade out over a set duration.
I thought of this while trying to mimic the 2D UI effects of an existing website format so the 3D page can fit into the rest of the website's format.
I thought of this while trying to mimic the 2D UI effects of an existing website format so the 3D page can fit into the rest of the website's format.
21 June 2017 20:42
Hi jem,
I recommend this project for lots of things it seems like![smiling]()
Have a look at the Cartoon Interior Project
You can also find the full example files in your SDK: \blend4web_pro\apps_dev\tutorials\cartoon_interior
This project uses HTML/CSS buttons to affect the scene. It might help a little.
I recommend this project for lots of things it seems like
Have a look at the Cartoon Interior Project
You can also find the full example files in your SDK: \blend4web_pro\apps_dev\tutorials\cartoon_interior
This project uses HTML/CSS buttons to affect the scene. It might help a little.
21 June 2017 20:27
Just looking at the API. I was wrong, there is a way to trigger a node from JavaScript. Have a look here:
https://www.blend4web.com/doc/en/logic_editor.html#entry-point
And…
https://www.blend4web.com/api_doc/module-logic_nodes.html#.run_entrypoint
![]()
https://www.blend4web.com/doc/en/logic_editor.html#entry-point
And…
https://www.blend4web.com/api_doc/module-logic_nodes.html#.run_entrypoint

21 June 2017 14:14
I think the closest thing you will get can be found in the Geometry Change code snippet. Click the 'View Code' button at the lower left of the page. The code looks like this:
function geometry_change(indices, positions) {
    var plane_blue = m_scs.get_object_by_name("Plane");
    var plane_red = m_scs.get_object_by_name("Plane.002");
    var indices = new Uint16Array([0,1,2,3,4,5]);
    var positions_blue = new Float32Array([0,0,1, -1,-1,0, 1,1,0, 1,1,0, -1,-1,0, 1,-1,0]);
    var positions_red = new Float32Array([-9,9,1, -10,8,0, -8,10,0, -8,10,0, -10,8,0, -8,8,0]);

    m_geom.override_geometry(plane_blue, "Material", indices, positions_blue, false);
    m_geom.override_geometry(plane_red, "Material.002", indices, positions_red, false);
    // update object's boundings after mesh geometry changing
    m_obj.update_boundings(plane_blue);
    m_obj.update_boundings(plane_red);
}
21 June 2017 14:05
You will need to do yor own character animation. Here is a good video that may help.
ianscott888 has a number of other videos that might help you as well.
ianscott888 has a number of other videos that might help you as well.
21 June 2017 13:56
Hi Federico,
I think the solution for this is the same as for the other problem you posted. See the answer I gave.
I think the solution for this is the same as for the other problem you posted. See the answer I gave.
21 June 2017 13:49
There is no specific API within Blend4Web but WebRTC can be used for P2P. I want to do some experimenting with WebRTC for multiplayer game voice communication. I think it could work well with MMORPG games.
21 June 2017 13:44
While you can use the JavaScript Callback node to execute a JavaScript function, I do not believe you can do the reverse.
In the Cartoon Interior project, there are HTML/CSS buttons that run JavaScript functions. So you can do anything with this code. JavaScript can do everything the nodes can do and much more. You can have both nodes and JavaScript. API for moving objects.
In the Cartoon Interior project, there are HTML/CSS buttons that run JavaScript functions. So you can do anything with this code. JavaScript can do everything the nodes can do and much more. You can have both nodes and JavaScript. API for moving objects.
21 June 2017 13:30
Hi Federico,
It looks like you need to build your project then deploy. In the Project Manager, look for the Build and Deploy buttons on the right hand side of your project listing.![]()
Check out this page in the user manual.
It looks like you need to build your project then deploy. In the Project Manager, look for the Build and Deploy buttons on the right hand side of your project listing.

Check out this page in the user manual.
21 June 2017 12:54
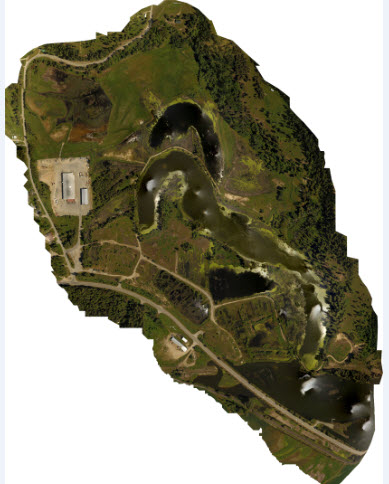
I have some imaging samples from using OpenDroneMap (WebODM) to process drone imaging into georeferenced photos and textured meshes. I did a video series on this you can see here: http://www.williamwelker.com/projects.html
Here is a full sized JPEG. 68 MB
Here is a GeoTIFF image. 576 MB. This is what is actually produced by WebODM (the browser based GUI for ODM). It is a much larger file size so download this only if you want to try pulling it into QGIS or ArcGIS as a mapping layer. This is a 300 acre project. Flown with a Phantom 4 on one battery.
![]()
Making a 3D model of a project this large results in huge file sizes.
Here is a smaller section .blend file if you want to have a look. 127 MB. This renders out just fine into HTML.
The small section was flown at 250 feet with high overlap on the images to produce better 3D modeling. The larger project was more optimized for mapping so it was flown high with less overlap.
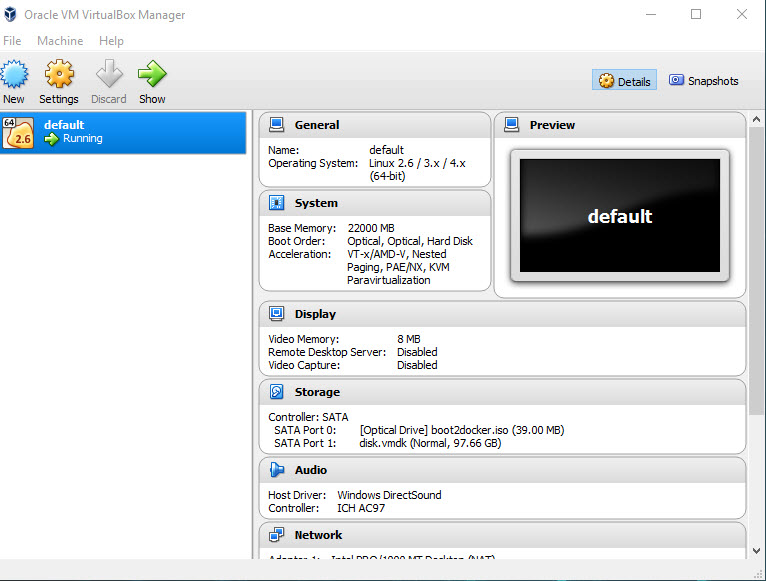
I did the large project with 22GB of ram allocated to the virtual machine.
![]()
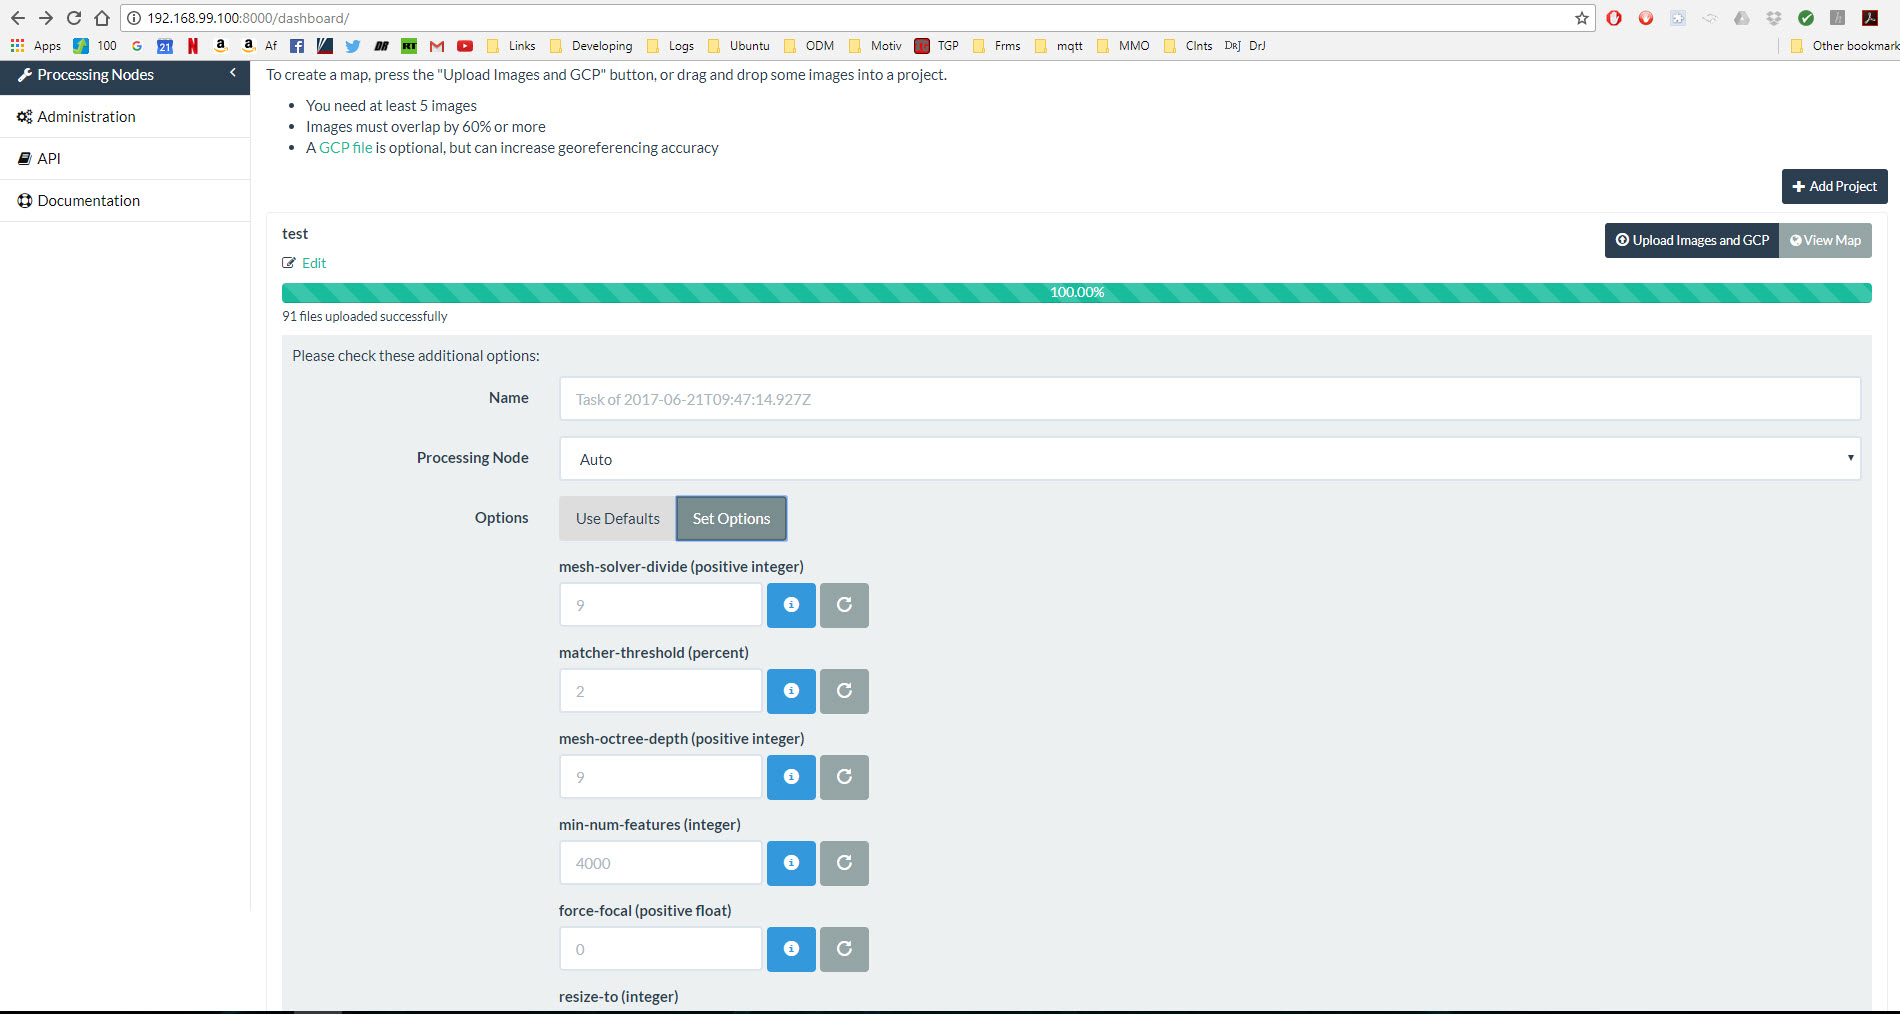
Even with that I had to reduce the number if matching points a little in the WebODM settings.
To change options, once you have uploaded your images and before you start processing, there is an options button.
![]()
Hope this is helpful. Feel free to post any questions here if you are trying to get ODM up and running. DigitalOcean has one-click Docker machine droplets(servers) if you want to try it. All you need to do is the Git clone for WebODM. ODM is under heavy development so improvements come fast.
Here is a full sized JPEG. 68 MB
Here is a GeoTIFF image. 576 MB. This is what is actually produced by WebODM (the browser based GUI for ODM). It is a much larger file size so download this only if you want to try pulling it into QGIS or ArcGIS as a mapping layer. This is a 300 acre project. Flown with a Phantom 4 on one battery.

Making a 3D model of a project this large results in huge file sizes.
Here is a smaller section .blend file if you want to have a look. 127 MB. This renders out just fine into HTML.
The small section was flown at 250 feet with high overlap on the images to produce better 3D modeling. The larger project was more optimized for mapping so it was flown high with less overlap.
I did the large project with 22GB of ram allocated to the virtual machine.

Even with that I had to reduce the number if matching points a little in the WebODM settings.
To change options, once you have uploaded your images and before you start processing, there is an options button.

Hope this is helpful. Feel free to post any questions here if you are trying to get ODM up and running. DigitalOcean has one-click Docker machine droplets(servers) if you want to try it. All you need to do is the Git clone for WebODM. ODM is under heavy development so improvements come fast.

