Making a Game Part 8: Lessons of Magic
2015-02-18
It is now a time to create dynamic elements for the player to interact with. These elements are bonuses which temporarily boost possiblities of the character, or save him from damage.
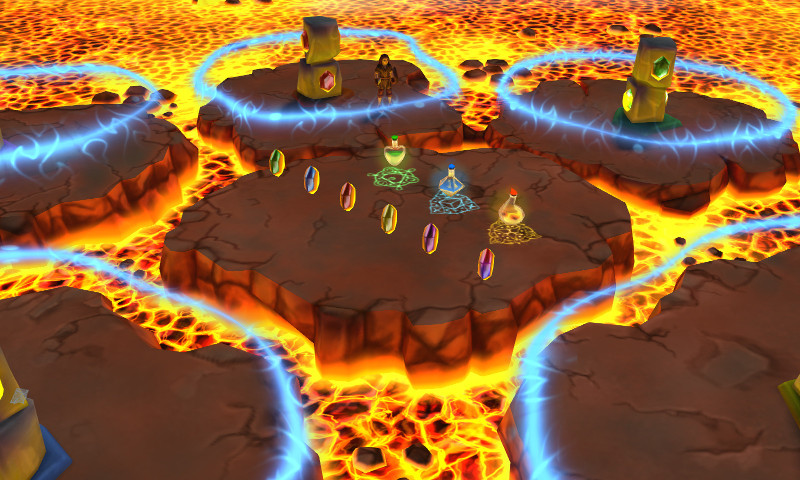
Scene overview.
Bonuses
Being seemingly simple, the bonuses are really sophisticated and complex objects consisting of several nested geometries and several dynamic materials.
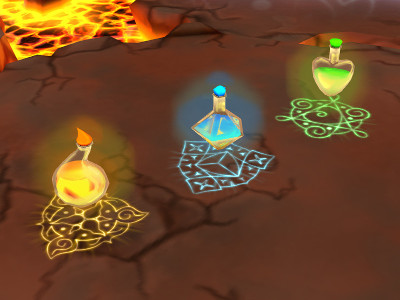
Bottles with a magic potion.
There are three types of bonuses in the scene in total: healing, magic shield and lava-walk. Using one of them as an example we'll look at their structure.
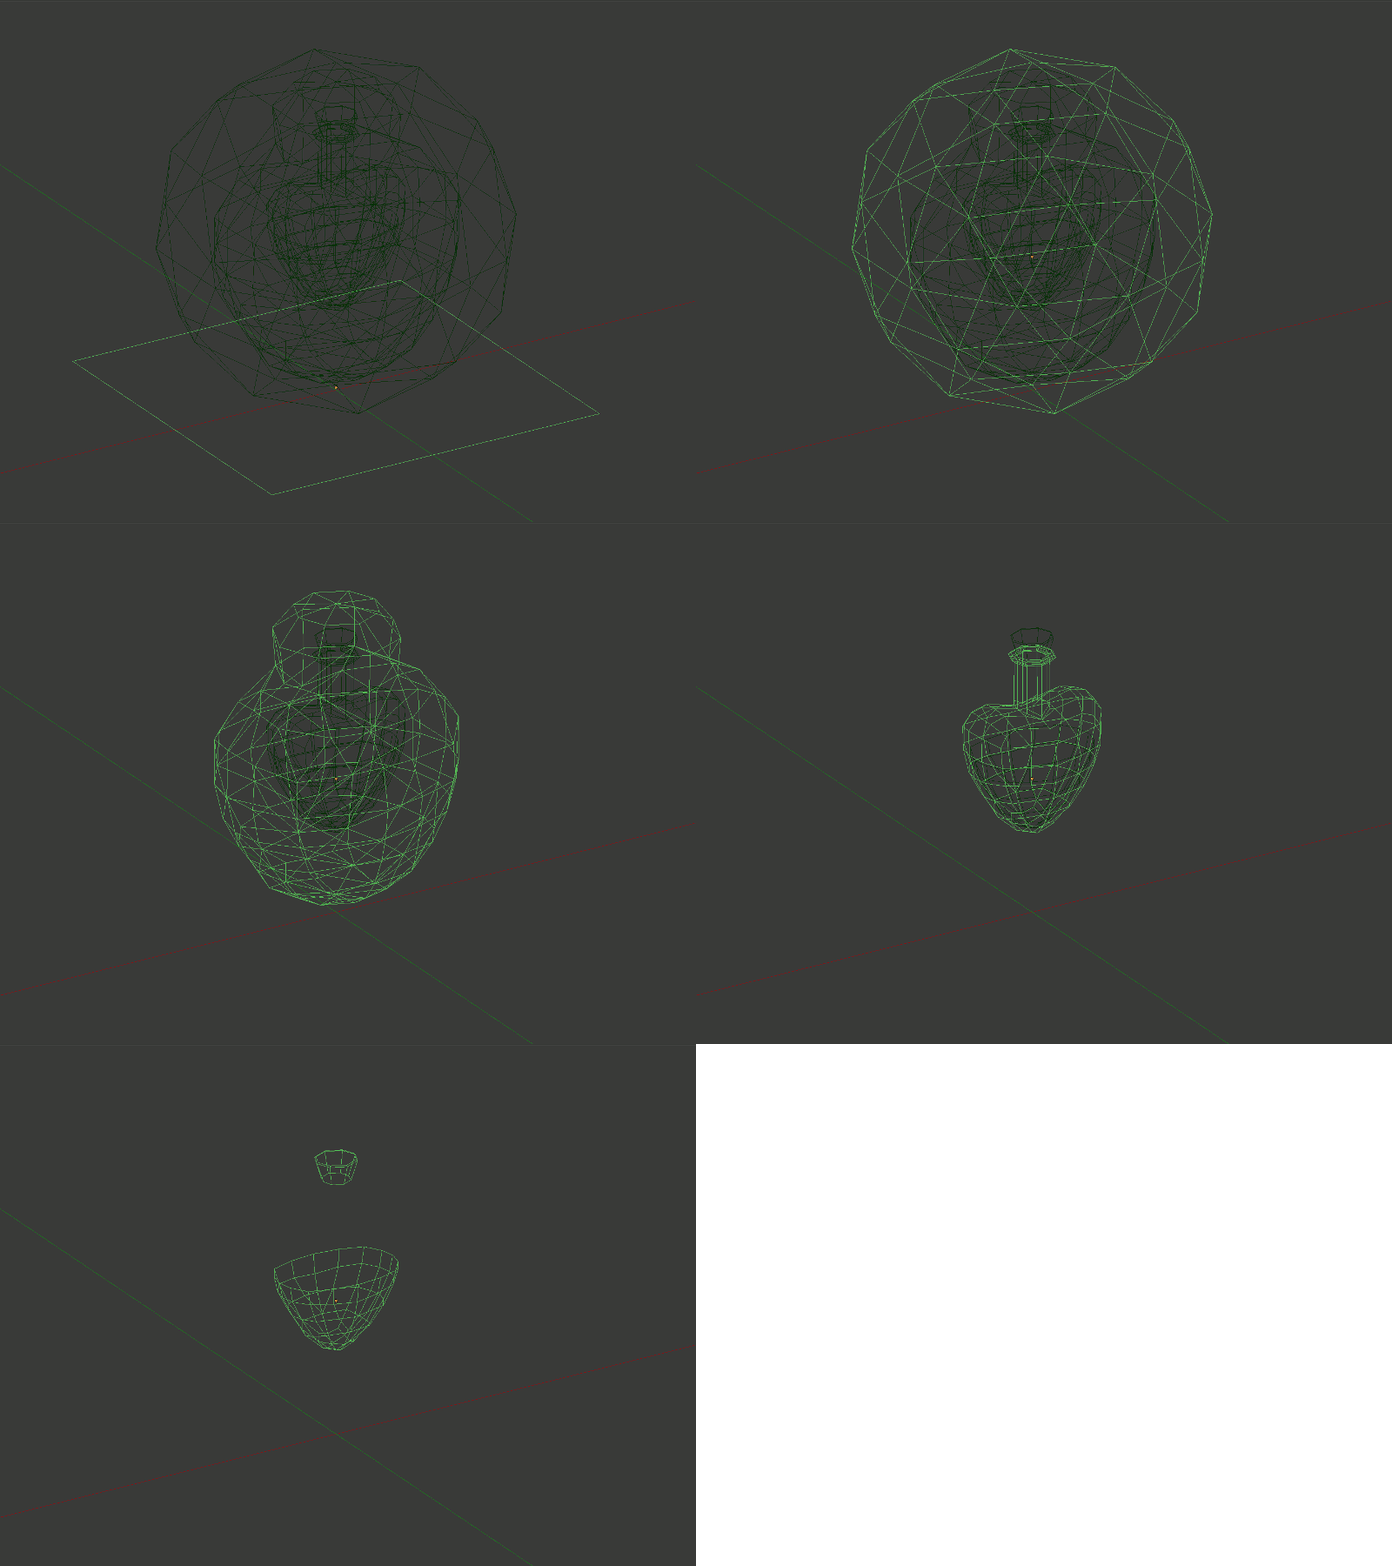
Demonstrating bonus geometry layering.
Every bonus consists of the following components (in the order they appear on the animated image):
- rectangular at the bottom - a magic sign
- big sphere - a light glow
- something between a form of a bottle and a sphere - a dense glow
- bottle geometry - a glass
- a cork and liquid geometry - the main bonus color
Now let's go further through each of them.
Bonus Magic Sign
The sign under every bonus is individual and has a quite complicated material.

RGBA texture layers with magic signs inside.
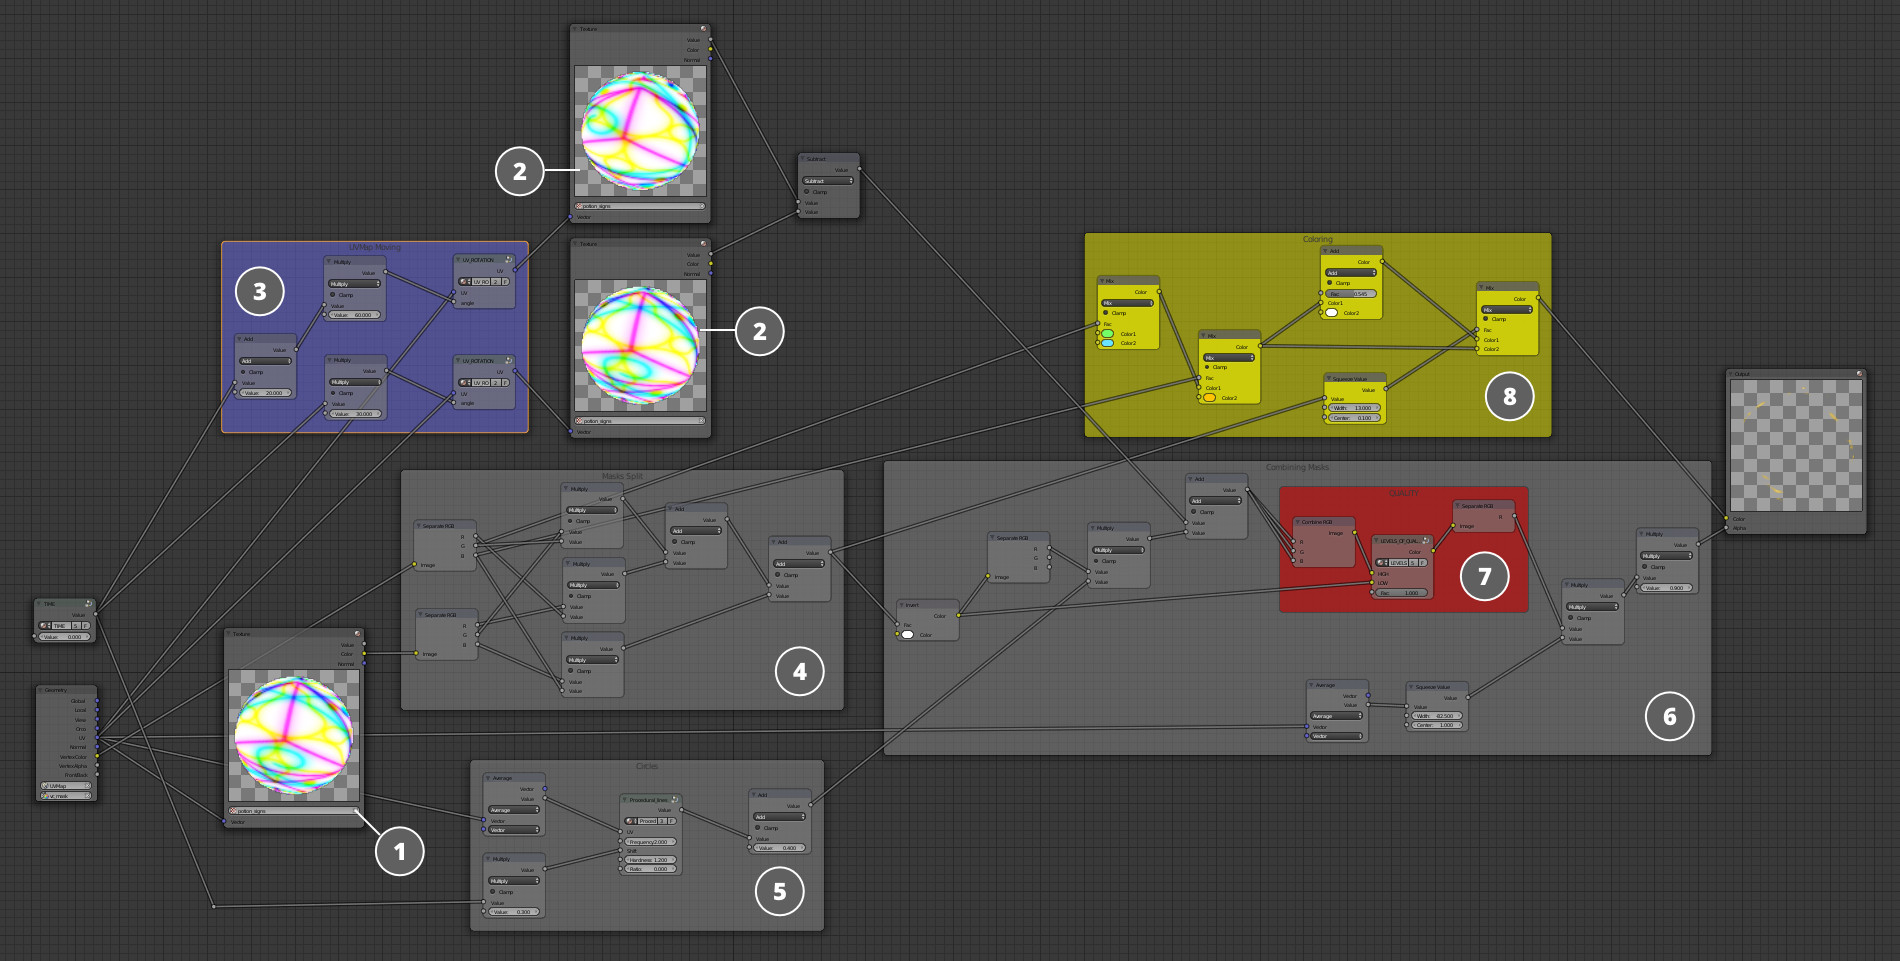
At the basis of the whole material there is a texture (1) with three symbols (one for every bonus) and a glow mask (they are packed in RGBA channels). Every symbol appears under its own bonus (4) with the help of a vertex mask.
Magic sign material under each bonus.
To create the effect of a spinning glow an alpha channel is taken from the texture which has rays coming from the center (2). With the help of a Time node and a specially crafted UV_ROTATION group their rotation towards each other occurs (3).
Note
You can look at the UV_ROTATION node group in the bonuses.blend file, which can be found in the free Blend4Web SDK. The UV_ROTATION node group is a rather complicated series of mathematical transformations over UV data and its detailed overview is not among the goals of this article.
For the magic glowing effect there is also a node group (5), which creates a chain of procedural rings coming from the center. Later, all these blocks will be combined into the common mask (6) and be put into the alpha channel of the Output node. Textures are painted "on the fly" in colors with masks each of which corresponds to its own bonus and then goes into the Color socket of the Output node.
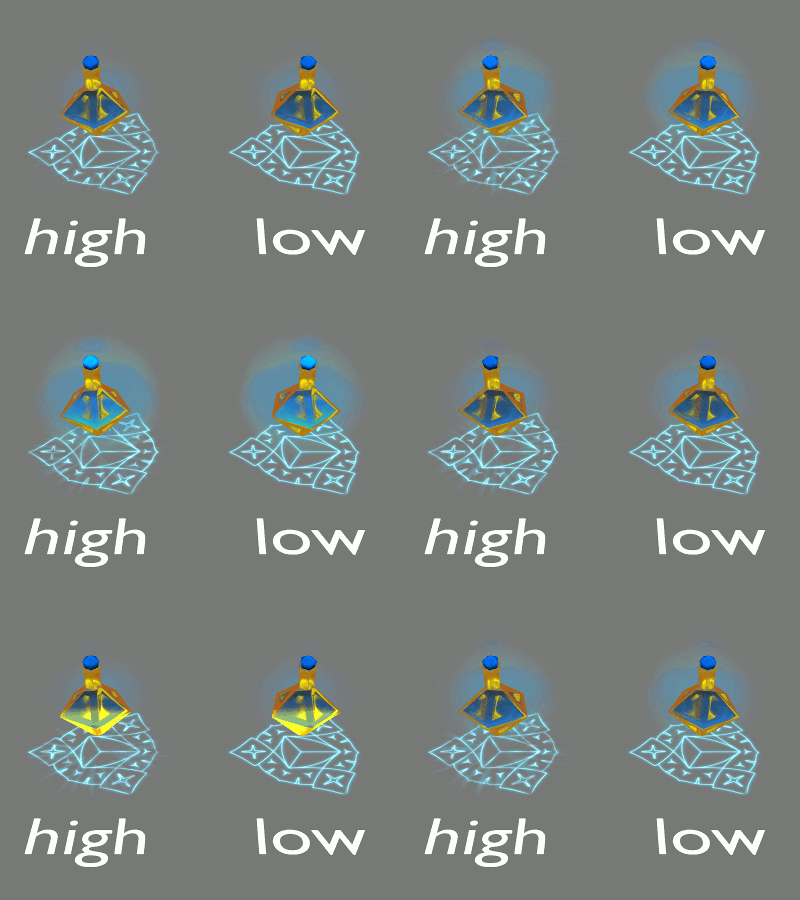
Difference in the material setup for the low and high quality modes.
It's also worth paying attention to a small optimization with the help of Level Of Quality node (7). For the high graphics quality the material is visualized as it is described above, but for the low quality mode all the dynamic transformations are turned off, and the user will only see the bonus symbol which doesn't change as time passes.
Magic Halo
For the magic halo effect there are two geometries being used: one is a sphere geometry and the other is almost completely the same shape of the bottle with a little blow-up. Material is the same for both of them.
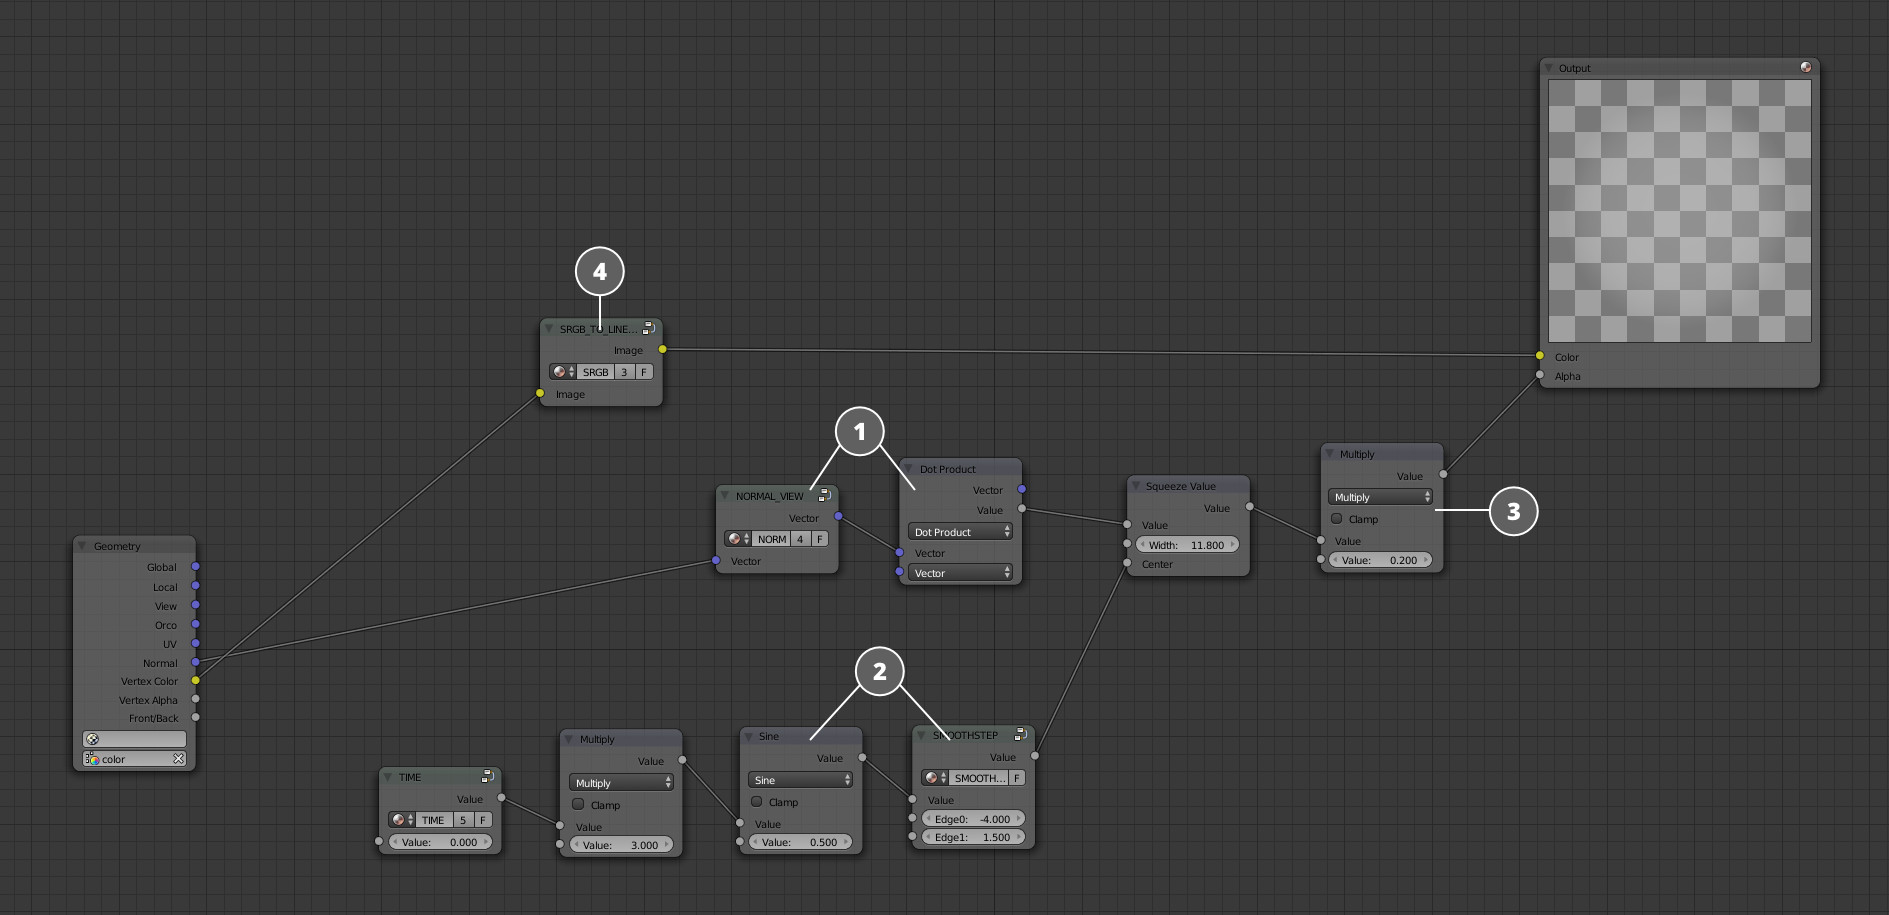
Magic halo material around potions.
The whole material is built on a Fresnel effect (1) imitation which is, with the help of Time node, constantly changes its value within a specific range (2). After making it even more transparent (3), we send the resulting mask into the alpha channel. The material's color is taken from the vertex color(4) contained in the sphere geometry
Bottle Glass
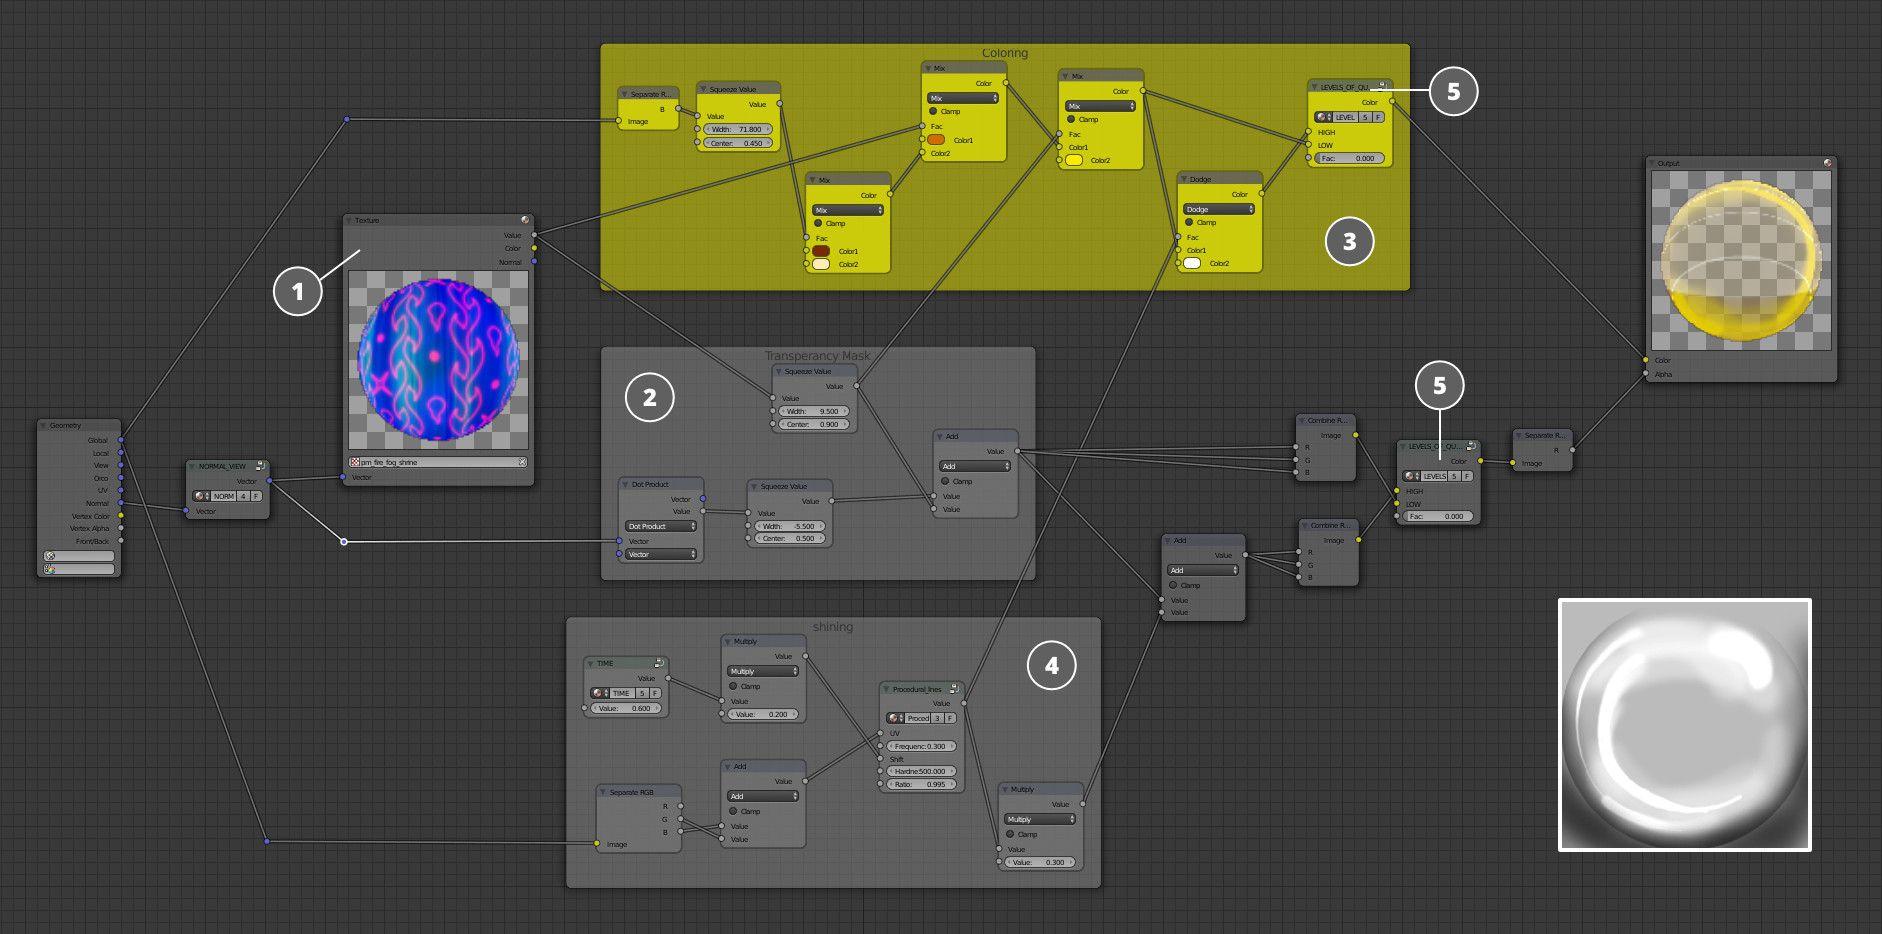
Bottle glass material.
The effect of the bottle glass is achieved as a result of the combination of the specially created matcap texture (1) and a Fresnel effect (2). A mask based on this combination is created and sent into the Output node's alpha-channel. There is fire constantly bursting around so it's quite logical that there are lots of fire reflections on the glass. They are also built with the same matcap texture as the base.
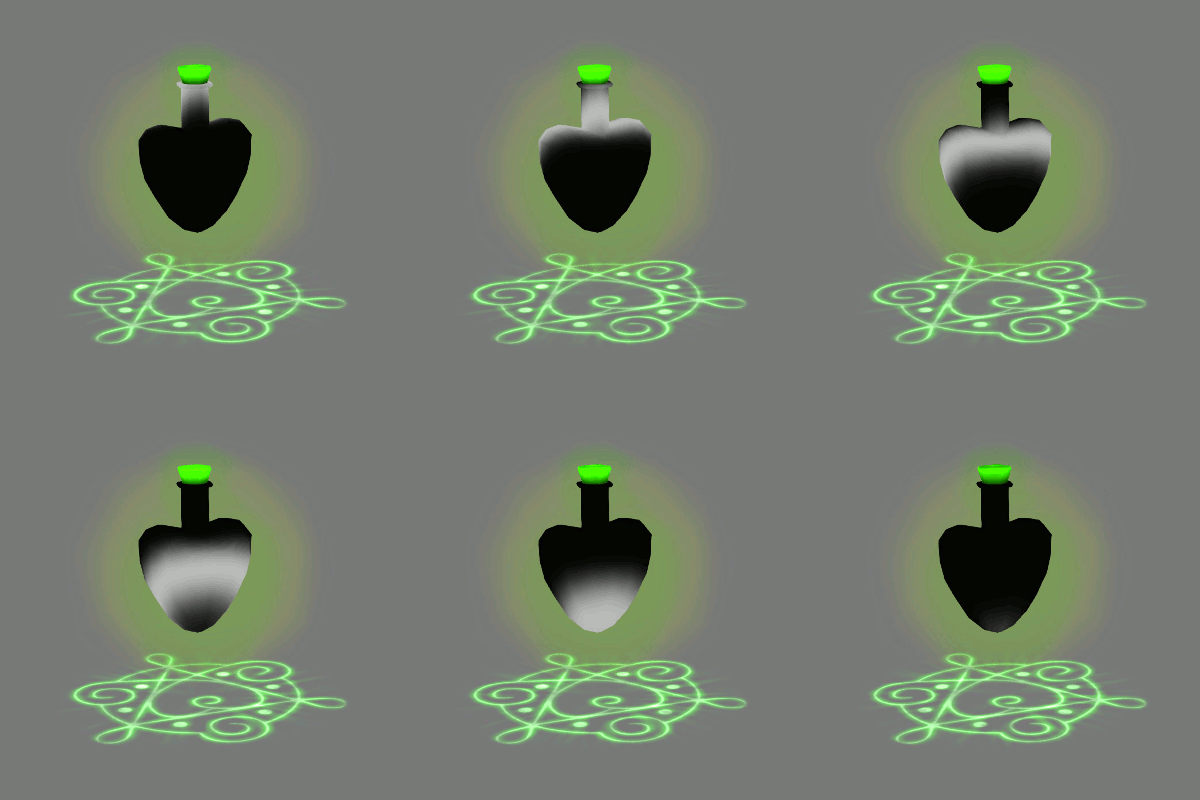
A fake specular used as a mask.
A fake specular (4) was added to the bottle's material to achieve more "magicity". It runs over the glass within a certain period and thereby creates a magic shine effect.
This effect is quite weak and excessively overloads system resources on small devices. That's why it is disabled in low quality profile with a help of a Level Of Quality node.
Magic Potion
The magic potion and cork's materials are the same and fairly simple.
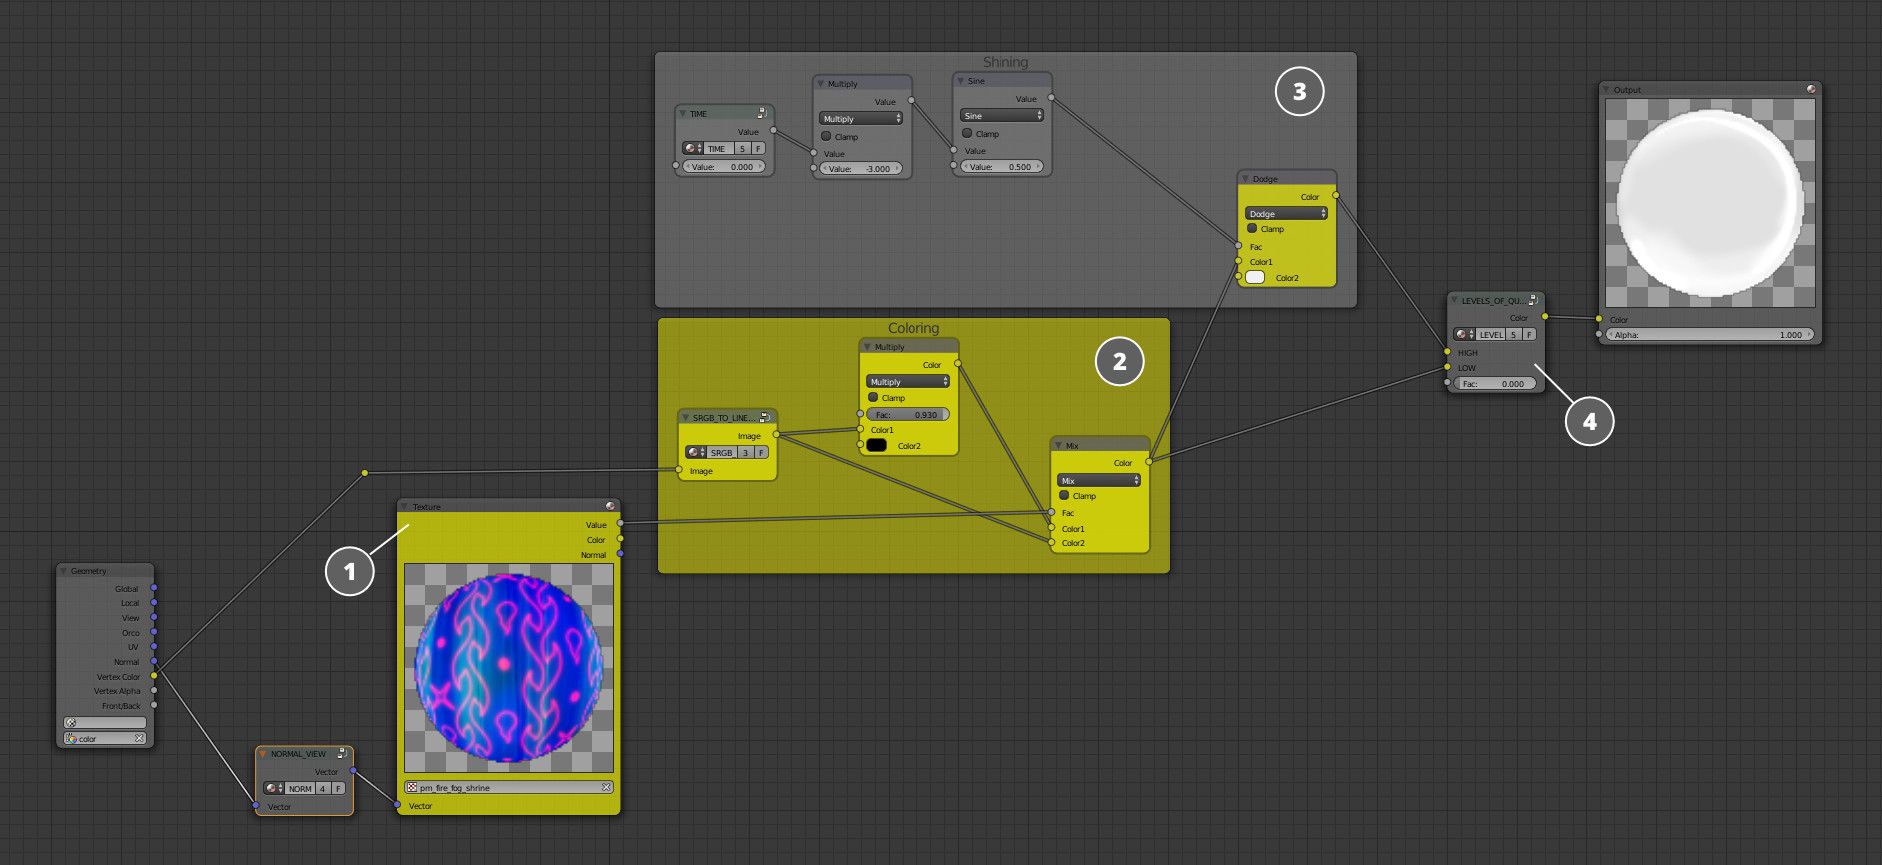
Potion's material.
The same matcap (1) texture as in the bottle glass material is in the base of this material. Its color is taken from the geometry's vertex color and then it is mixed with the texture (2). The potion sometimes flushes with a magic light (3) to point out that it's actually a magic potion. It was made with the help of a special Time node. This effect was removed in the low quality profile with a Level Of Quality node for optimization purposes.
Bonuses description is completed. But one more important part of the magic action is left which is the influence of the magic potion on the character!
Magic Influences the Character
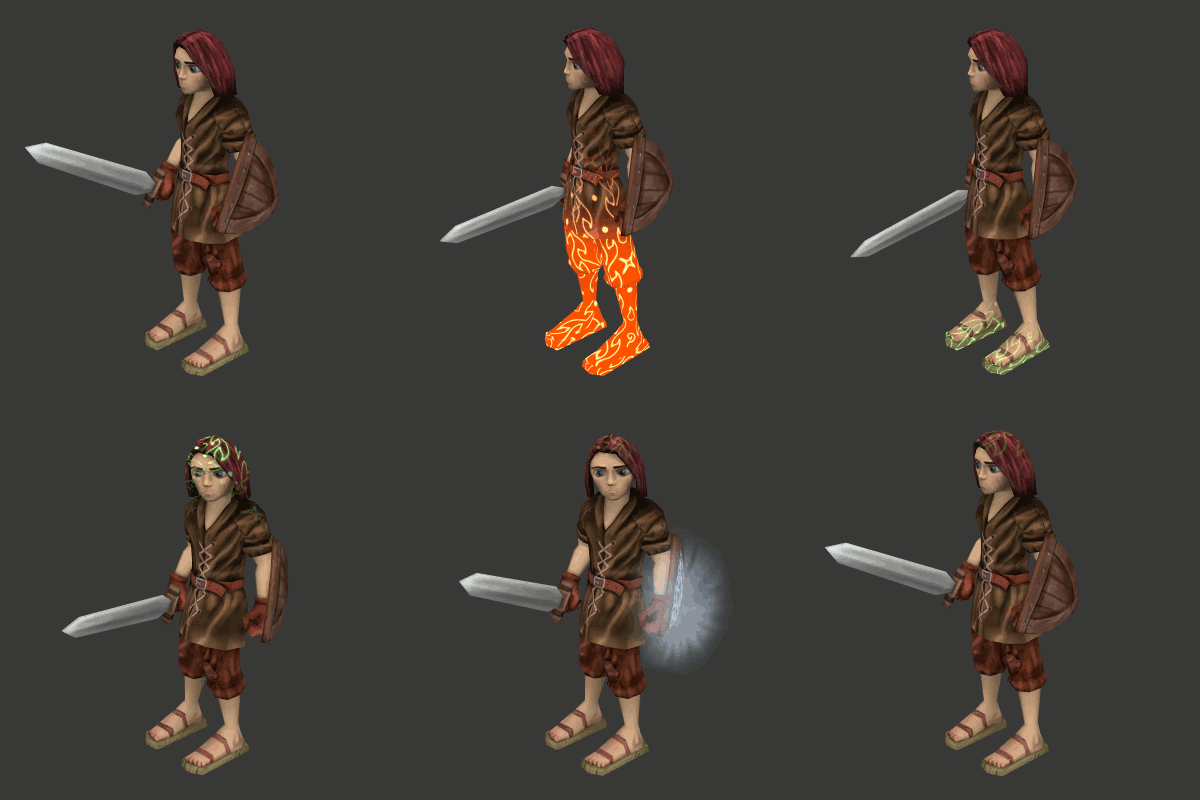
An example of magic influence after the character has drunk the potion.
After the character takes some bonus he looks like this. Let's take a look at the changes the material has received to allow such magic happen!
Material of the Character
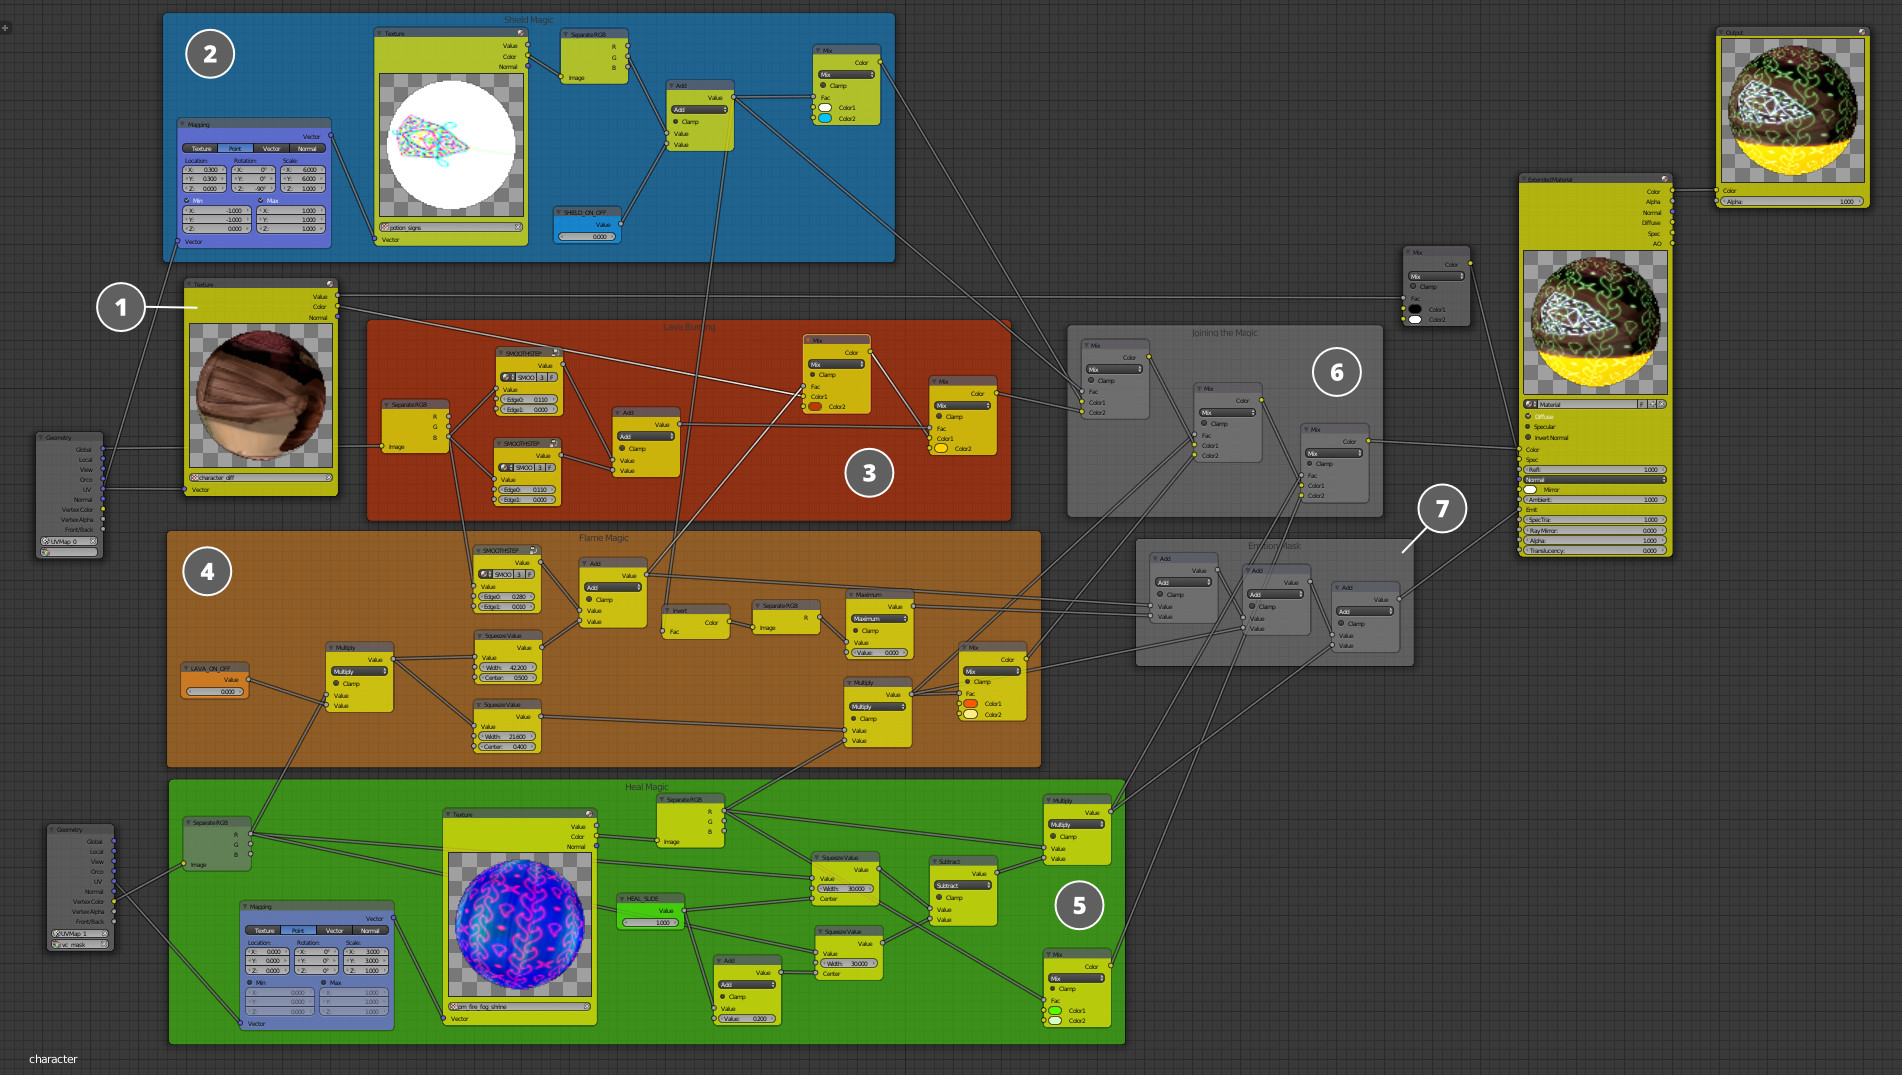
Modified character's material.
Three big blocks (2, 3 и 5) were added apart from two additional textures which are already used in the bonus material. They are responsible for turning on and off magic influences.
The node block marked with blue (2) is responsible for the magic shield appearance. The Value node is multiplied by the value of the mask coming from the texture. When it (mask value) is equal to 1, the node allows this group, and when it is 0 it disables the group.
The red block (3) is actually a previously used effect of the character's burning legs when he touches the lava. A more detailed description of this block can be found in the earlier article from this series.

One of the RGBA textures used in the bonuses and character's materials shown with layers.
The node block shown in orange (4) is responsible for the magic protecting the character from the lava's damage. The vertex color with black/white stretch marks in all the character's growth from head to toes was added to the geometry to achieve this effect. The legs of the character are highlighted with a magic effect when the Value node changes. This is done with the help of this vertex color and a tiled magic sign texture.
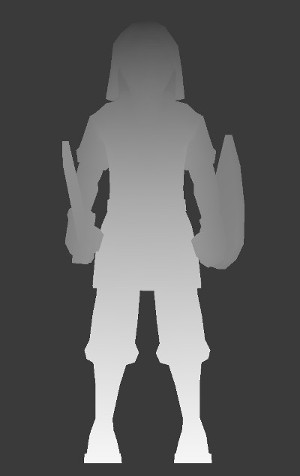
Vertex mask on the character's geometry.
A node block shown in green (5) is responsible for the healing magic effect. It also uses a repeated texture with magic symbols and a vertex mask for repeating texture visualization in the correct area. It adds a magic effect to the character when the Value node changes.
All the magic effect blocks are combined (6) with the main character's texture (1) later. The mask (7) for the Emit socket of the material is created to achieve self-luminescence in correct areas, as the magic should shine!
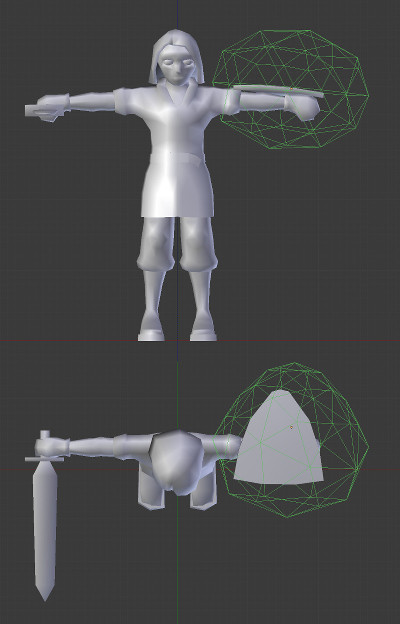
Additional geometry for the halo around the shield.
In addition to the character, a special spherical geometry for the magic halo around the shield was created. One of the character skeleton bones in the left arm was selected in the object's properties in the Relations section as an object's Parent. Thus, the sphere is always around the shield on the character's hand.
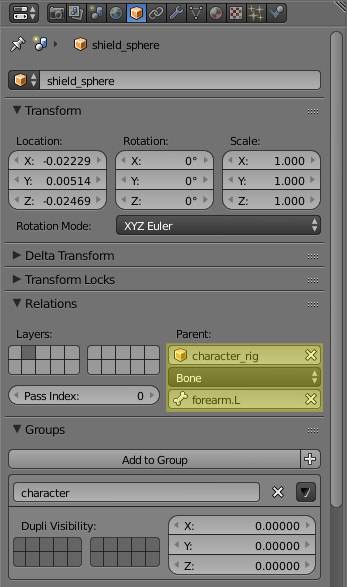
Parenting the halo's geometry to the character's bone.
The material structure resembles the bonus glow material in general and there is the same texture used here (1).
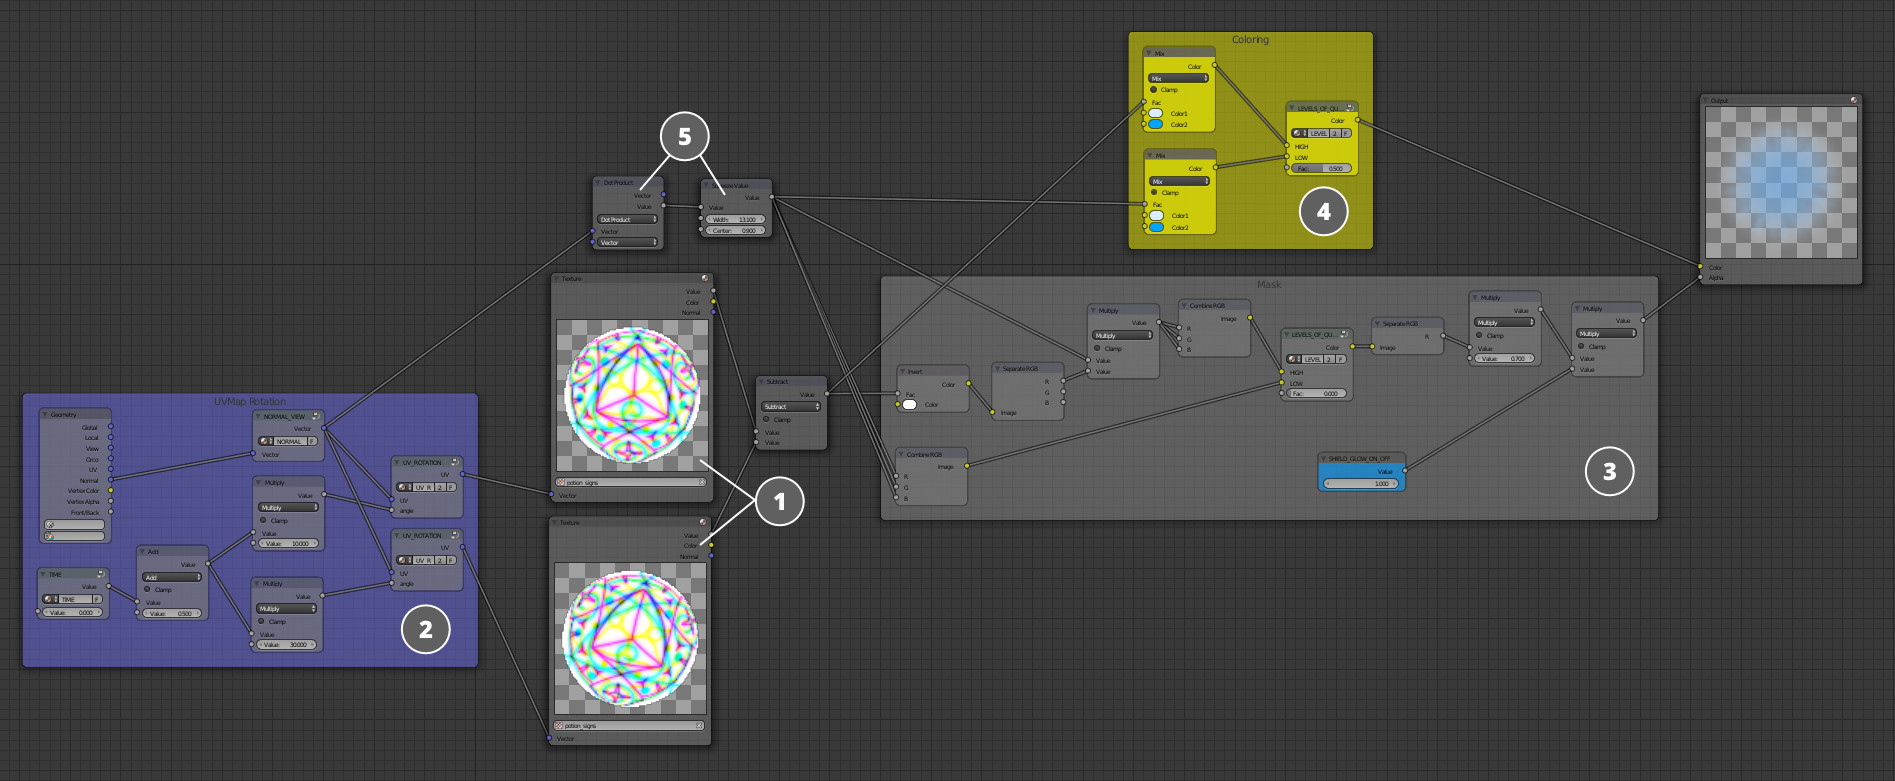
The character's shield halo material.
Two textures are rotated toward each other (2) with the help of the UV_ROTATION node and added into the mask based on the Fresnel effect (5). There is also a Value node in the block connecting textures and the Fresnel mask. This Value node is responsible for turning on and off the material's visibility. And a special Level Of Quality node disables all the textures for a low quality profile. The color information for the Color socket of the Output node is generated in the upper block.
Conclusion
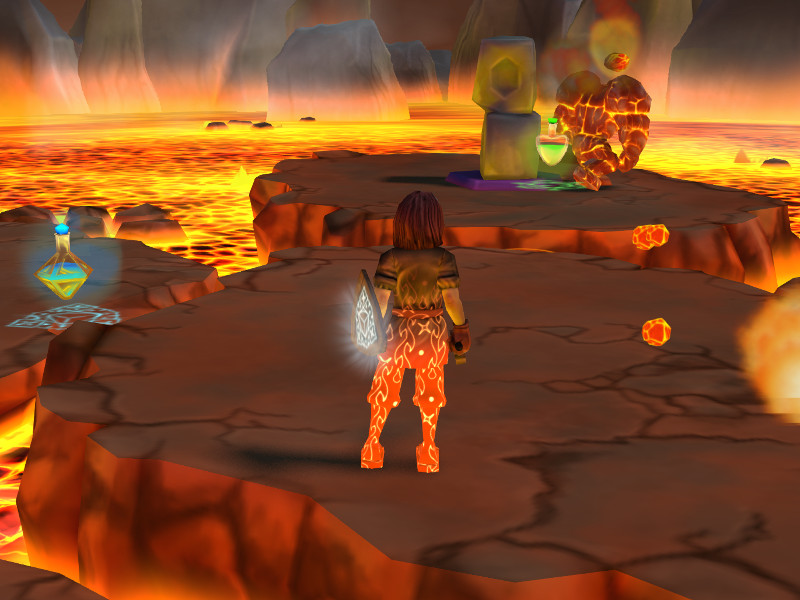
The character under the lava-walk and magic shield effects.
Though somewhat primitive, the game is now filled with magic! Now it is not that easy to slay the main character. He became more capable of offense and defense. In the next tutorials it will be described how to fill the world with enemies and finally give the game-play some meaning! That is, the story will focus on the world's game elements creation. Don't miss it!
You can discuss this article in the corresponding topic on our forum.
The source files are included in the free Blend4Web SDK.
Changelog
[2015-02-18] Initial release.

