Visit here Mykfcexperience.com
Project Manager: New Horizons
2017-07-14
There are times when you might think that you are omnipotent. You fancy yourself some sort of ace, a perfect professional who can move mountains at will. Have this happen to you? Well, I think that one lives and learns. You can’t possibly know everything, even within a single area. Today, I am continuing to talk about the Project Manager, hoping that this article will be useful not just for the beginners.
You can find the previous article here.
If You Chase Two Rabbits...
This saying does not hold true in the Project Manager. You can chase as many rabbits as you want and never lose any of them… um, what am I talking about? Well, about projects, of course! And about many, many applications inside one project.
Every project in Blend4Web is a unique entity with settings, parameters and a root directory of its own. However, there is no reason why you shouldn’t work with several independent applications inside a single project.
Why you might need this? The most obvious example would be developing an application for several social networks, each one with its own quirks and requirements. You will probably have to alter HTML, CSS and maybe even JS files. However, your main content (graphics, music, logic etc.) won’t be changing, right? This is only one of the cases where developing several apps in one project would come in handy.
This is not particularly hard to do. When you create a new project in Project Manager, it is already able to work with multiple applications. It’s just the program won’t tell you about it, so not many users are aware of this feature.
If you open a newly created project and view the files in its root folder, you will see something like this:

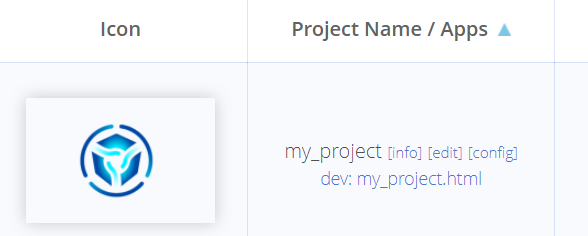
And in the Project Names/Apps column in the Project Manager you will see this:

Click the dev:my_project.html link, and the Manager will run the application in a new tab in browser. Well, you should already know this much.
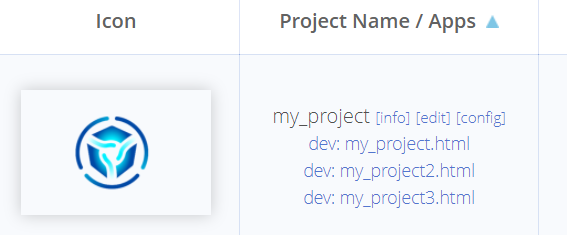
But what if you create several HTML files in the project folder? In this case, something like this might happen:

What is interesting here is that the Project Manager considers each HTML file in the project folder an independent application. This is understandable, as it is there where you set CSS, scripts and other stuff.
If you try to build the application using the Build Project command, the Manager will compile each and every HTML file and files associated with them. This allows you to work with multiple variations of a single application inside a project.
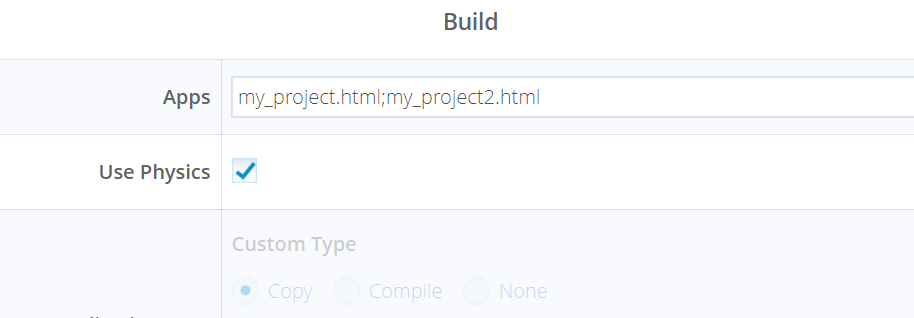
Now, let’s take a look on a different task: how to make Project Manager not to take into account specific HTMLs. If you click the config link near the title of the project (see the picture above), the project configuration window will open. Add the HTML files you need to the Apps field. The program will recognize only the file listed in this field and will work with them exclusively. File names in the field should be separated by semicolons.

The Art of Building
Beginners and even experienced users do sometimes run into trouble with deploying applications to a web server. I’ve seen fully operational programs with HTML files containing long lists of engine source files in the SRC folder. I’ve also seen people asking on the forum: “Well, I’ve copied the folder, but it won’t work!”.
So, here are the rules of deploying applications with Project Manager:
Make sure that JavaScript Obfuscation Level in the project settings is set to Advanced. This will tell compiler to minify the resulting JavaScript code and make it a bit harder to read.

Execute the convert resources command. The Project Manager will scan all your files (images, sounds, video etc.) and automatically covert them to formats more suitable for web browsers. But do not delete original files! You can rely on the engine to decide which formats are better suited for certain browsers. Aside from converting media data, this command will also create compressed files in the gzip format, which is especially useful if you cannot set up compression on the server side. To use these gzip files, you have to add a specific assets_gzip_available: true directive to the engine initialization code:
var m_app = require("app");

m_app.init({
    canvas_container_id: "canvas",
    callback: init_cb,
    autoresize: true,
    assets_gzip_available: true
});
Execute the build project command and test how the application works by running build: my_project.html (your own project will, of course, have a different title).
Finally, execute the deploy project command, download the application archive and unpack it to a proper location in the server.
By following this simple list of actions you can be sure that your project will work on a server without problems and will be compatible with the broadest set of devices.

