Anchors Explained: How to Set Up Annotations
2017-04-03
When you are working with 3D graphics, whether you like it or not, you begin to think in its terms. Any idea can be embodied in a 3D object, supplied with colorful material and provided with animation… here, an artist’s spirit can finally break free.
However, some simple things suddenly become just too complex when you are trying to implement them in 3D space. Take text, for example. You are probably aware of the fact that you can easily create text captions in Blender. It even features a kind of 3D text editor where you can set up font, its style, various spacings and everything else you might need. What’s more, Blend4Web is perfectly capable of understanding Blender text objects and rendering them in a web browser. But what you have to keep in mind is the fact that these objects are nothing more than simple 3D meshes that are not really fit for this particular task. Let’s go over their weak points:
1. They require too much memory. Every letter is a separate 3D object that consists of multiple vertices. Imagine what will happen if you have several hundreds of them.
2. Low quality. You can cheat and create a texture with the text you need beforehand, and then apply it to a simple plane. However, a text like this will not look very good, especially from a distance.
3. Configurability… don’t even think about it.
It would have been so much easier if we were able to use the text itself for text rendering, just like, you know, in a text editor.
What… did you just mention Canvas? Oh yes, you can use it. It is entirely possible to write a text on the canvas using standard HTML5 features. It is easy, but also slow, as WebGL has to literally draw each letter on the canvas, slower than it takes to render text with generic web browser methods.
Blend4Web offers you its own method of rendering text, which combines the speed of browser rendering with the ease of navigating in 3D space.
Fast And Simple
Among Blend4Web demos, there is one outstanding application called Planetarium. It shows our Solar System with masterfully done planet models orbiting the sun.
The most interesting part for us, however, is interactive captions. Each one of them is attached to a specific planet. If you click it, additional text information will be shown. And, they look stylish too.
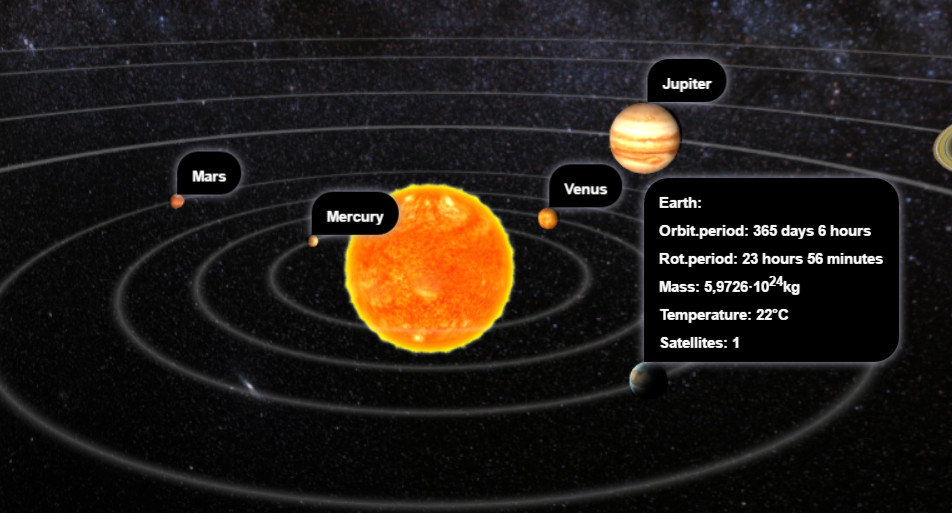
All this starts with an anchor. This is what will keep your caption in the deep sea of the scene.
As you have probably guessed, an anchor is a special Blender scene object. Its purpose is to set a point that will be used to show text. In the Planetarium app, for example, anchors are attached to the planets and move with them.
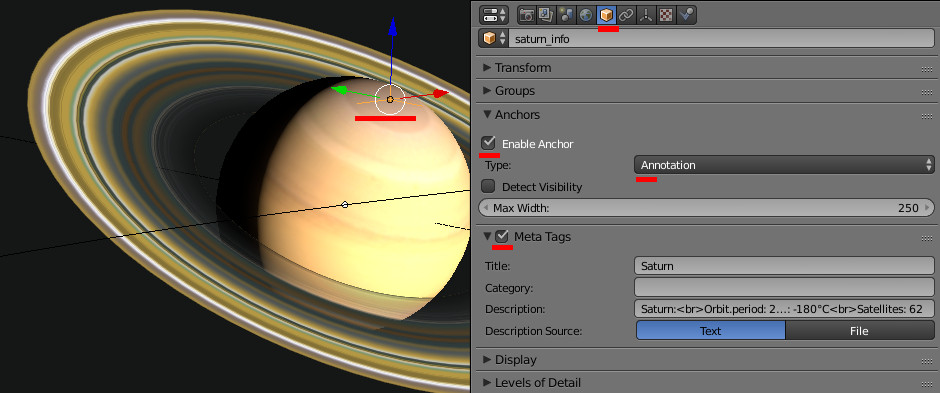
An Empty object is used as an anchor. At the picture above, it is located near Saturn’s pole. It can be added to the scene with the Add | Empty | Plain Axes menu (the menu can be opened with the Shift+A hot keys).
If you want your anchor to be attached to a specific object, you should make a “parent-child” link. To do this, select your Empty, then add the root object to the selection (hold the Shift key while selecting it) and press Ctrl+P.
But an Empty by itself does nothing. To make captions visible in the browser window, you have to turn on the Enable Anchor option on the Object panel of this Empty object. Make sure that the Type field is set to the Annotation mode. The text itself is stored in the Meta Tags group.
Keep these simple rules of working with anchors in mind:
1. If the Meta Tags option is disabled, the name of the Empty object is used as the name of the anchor.
2. The Annotation mode uses built-in anchor design.
3. If you enter some text in the Description field, user will be able to see this text in an additional panel that will open by clicking on the name of the anchor.
4. The Description field can only contain text data. Don’t try to add images, links or iframe elements in it.
There is one more interesting option: Detect Visibility, found on the Anchors panel. Take a look at the picture below to find out what it does.
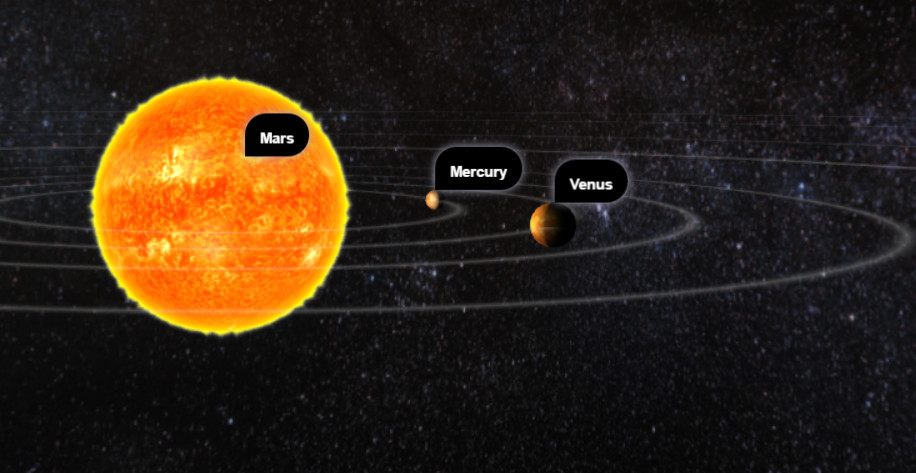
Here, the Mars object is covered by the sun, and isn’t visible, but the anchor with its name still is. Sometimes you might need this exact behavior, but other times you need to hide an anchor when an object is not visible. And this is exactly what Detect Visibility option does.
Expert Mode
The method that the developers offer you is convenient and easy to use, it is functional and looks pretty. However, it is rather limited as well. So let’s learn how to create your own design.
Here, everything is rather easy as well. You just need a regular anchor with the Custom Element option enabled in the Anchors field. From here on, you are in complete control of the design of your anchor. Just don’t forget to specify the ID of the element you need in the HTML Element ID field.
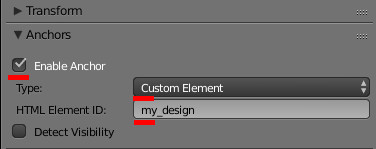
Everything else is done with HTML, CSS and JavaScript, and there are no limitations.
Let’s try to make a simple text output for our anchor. For example, one that simply prints some text in the background.
First, let’s define a place for the new element in the HTML file. Don’t forget that it should be located below the Canvas container:
<body>
  <div id="main_canvas_container"></div>
  <div id="my_design">This is my Anchor!</div>
</body>
The my_design title is used as an ID. This title should be specified in the HTML Element ID (see the figure above).
Then, let’s add a description of the element to CSS. I’ve altered the colors of the font and the background:
#my_design {
  position: absolute;
  background-color: #ffa201;
  border-radius: 5px;
  color: #000;
  font-weight: bold;
  box-shadow: 0 0 4px 2px #a94c00;
}
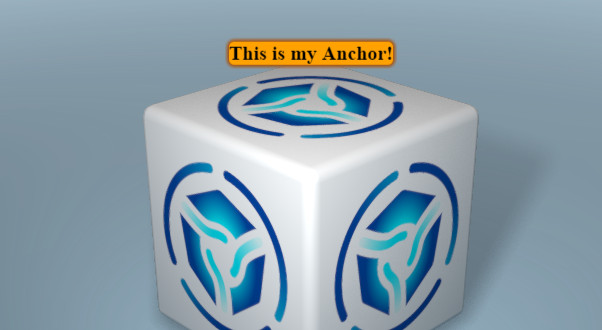
Now my anchor looks like this:
Now, let’s raise the bar by adding an option to open description window by clicking the name of the anchor.
Let’s alter the HTML file a bit by adding a new element for an additional window:
<body>
  <div id="main_canvas_container"></div>
  <div id="my_design">This is my Anchor!
	<div id="my_design_child"> Oh, yes! I see it...</div>
  </div>
</body>
And let’s expand CSS:
#my_design {
  cursor: pointer;
  position: absolute;
  background-color: #ffa201;
  border-radius: 5px;
  color: #000;
  font-weight: bold;
  box-shadow: 0 0 4px 2px #a94c00;
  display: none;
}
#my_design_child {
  position: absolute;
  top: 30px;
  background-color: #000;
  background-size: cover;
  height: 100px;
  border-radius: 5px;
  color: #ffa201;
  font-weight: bold;
  box-shadow: 0 0 4px 2px #a94c00;
  display: none;
}
Take a close look at the CSS blocks. Aside various bells and whistles, there are new display fields. These fields can be used to show and hide blocks. The blocks are turned off at startup. By the way, don’t try to use the visibility CSS property for this. This property is under complete control of the Blend4Web engine.
And now, it is time for some JavaScript code.
I’ve placed an entire code in the load_cb function that is called after the scene is loaded (it is a standard JavaScript template generated while creating a new project).
Find HTML elements we need:
var my_design = document.getElementById("my_design");
var my_design_child = document.getElementById("my_design_child");
Enable showing the name of the anchor:
my_design.style.display = "block";
Adding the “click” event to the first block. Now, if the title is clicked, the program will call the specified function to switch the visibility of the second block:
    my_design.addEventListener("click", function() {
		if (my_design_child.style.display == "block") {
			my_design_child.style.display = "none";
		} else {
			my_design_child.style.display = "block";
		}

    }, false);
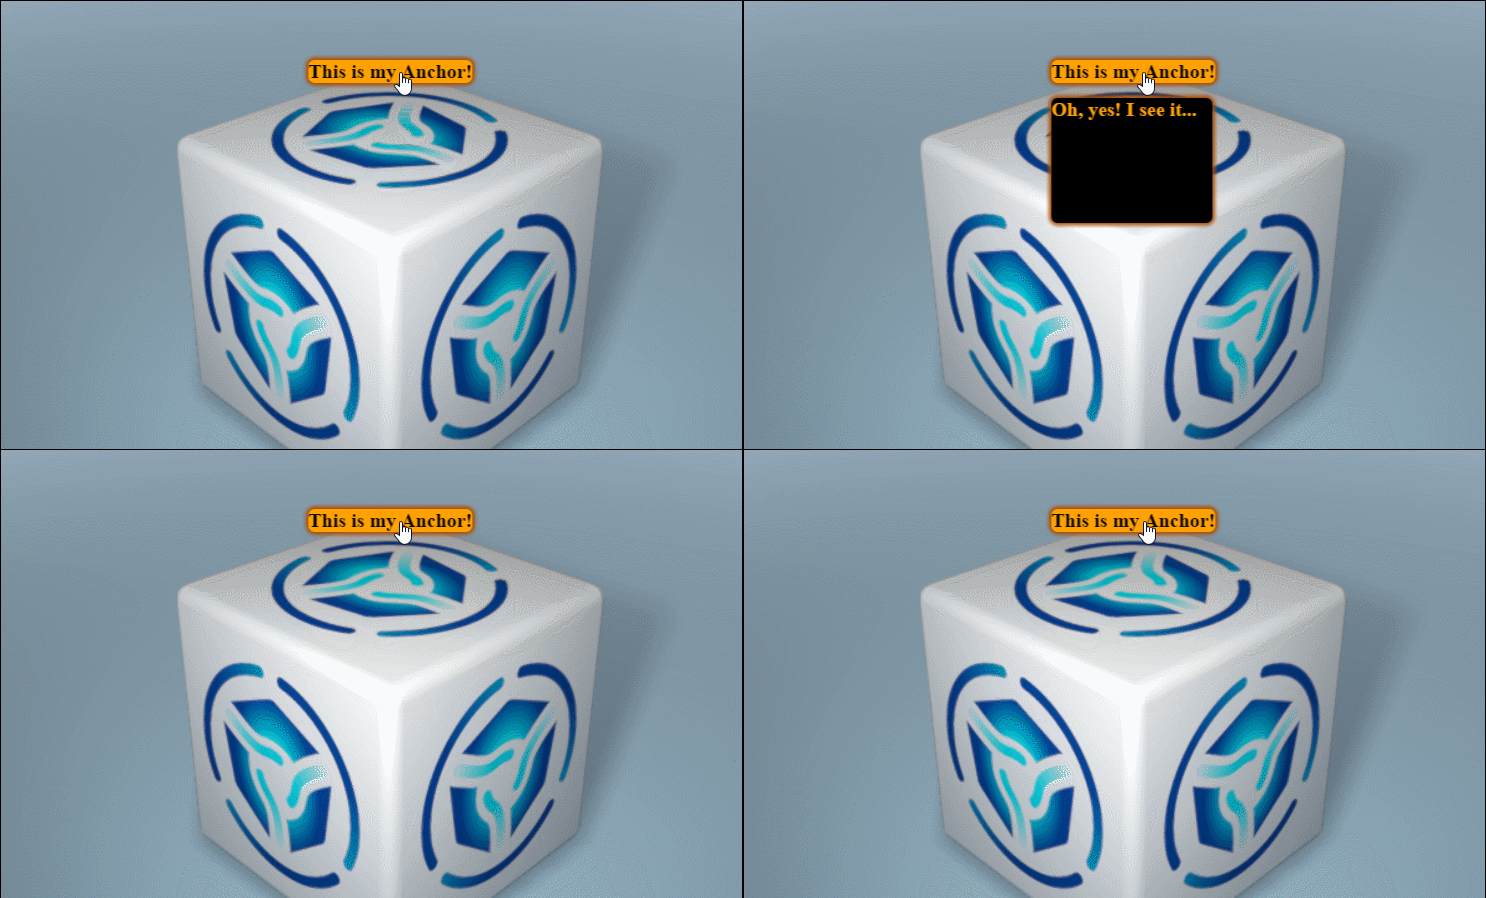
In the end, here’s what I’ve got:
As you can see, the Custom Element mode gives you free reign to create a GUI with any level of complexity, limited only by your imagination.

