Web Player JSON. Practical Approach
2016-11-01
In the previous article I compared two methods that we use in creating WebGL applications and I clearly showed that the combination of Web Player and JSON is undoubtedly superior to the simple Web Player and HTML. Those of you who do not agree with this, and those who have not read this article yet, please read it first. Then we will go further...
What could be easier than creating a JSON? Open Blender, make a scene, select the Export Blend4Web (JSON) and… scratch your head, puzzled and confused. Yes, now you have to figure out what to do with it. Let’s start from the very beginning.
Blend4Web SDK has an excellent tool called Project Manager. It was made especially so the user isn't left alone face to face with a command line. Let me tell you a little secret: all project management operations are performed by Python scripts. If you consider yourself a huge geek, you can take a look at this part of the User Manual. But for a mere mortal, learning the features of the Project Manager will suffice.

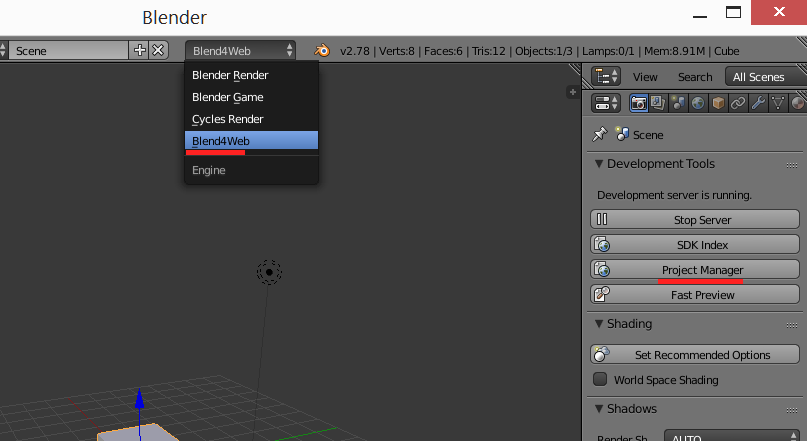
As you probably know, you have to switch to Blend4Web mode (marked red in the picture) to work with Blend4Web settings. Then you only have to press the "Project Manager" button and after a couple of seconds your web browser will open the application you need so much.
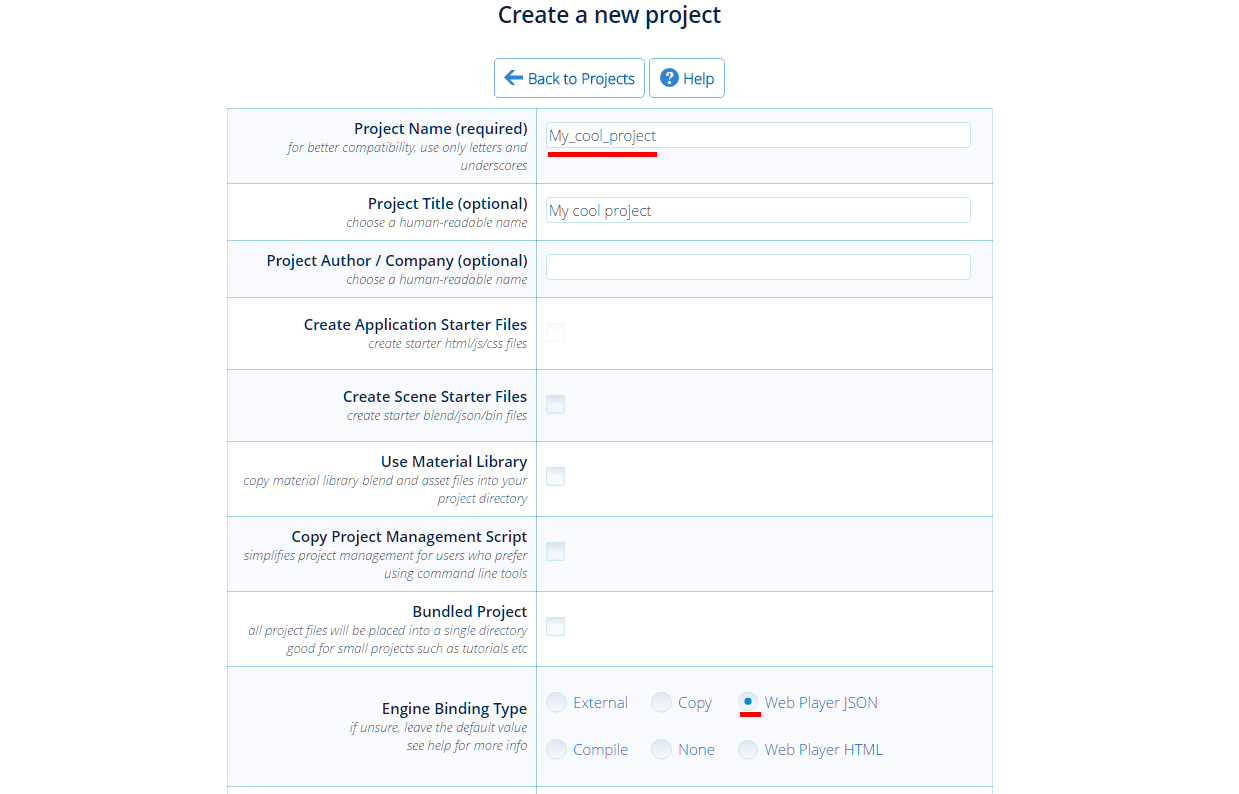
Work on a project should start with creating it. For that, there is the "Create New Project" button. Press it, and the following will appear:

This is a setup window for a newly created project. There are a lot of options, not all of which fit on the screen.
The most important thing is that you have to name your masterpiece in the Project Name field and check the Web Player JSON option box. Then, you can simply press the Create Project button to do exactly that, but do not hurry. There are some other options that can be useful.
By default, Project Manager creates an empty project in the designated folder. It is not very useful yet, but you can make the program perform important actions:
1. The Create Scene Starter Files option. Turn it on, and Project Manager will add a new .blend file (Blender scene).
2. Use Material Library. Turn it on if you are planning to use high-quality materials created by the Blend4Web development team. The program will copy the entire library to your project folder.
3. Bundled Project. Blend4Web project regulations imply that different folders are used to store different file types. For example, Blender files are stored in the blender folder, while the textures can be found in deploy/assets. So this option is useful if you want to keep all your files in the project folder. Keep in mind that you can only use the "Bundled Project" option with Web Player JSON and Web Player HTML project types. This feature is especially useful for the simplest applications.
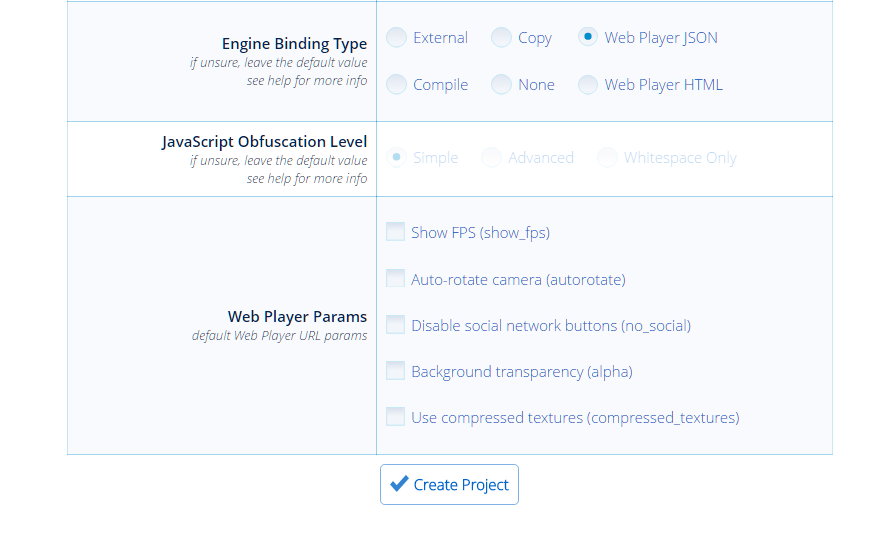
There is yet another fine point in creating Web Player JSON projects. You have probably noticed that after selecting this project type an additional field of options becomes available.

These additional parameters do exactly what their names suggest. The data you have selected is transferred through the URL bar to Web Player and, if you wish to use them, just read these instructions.
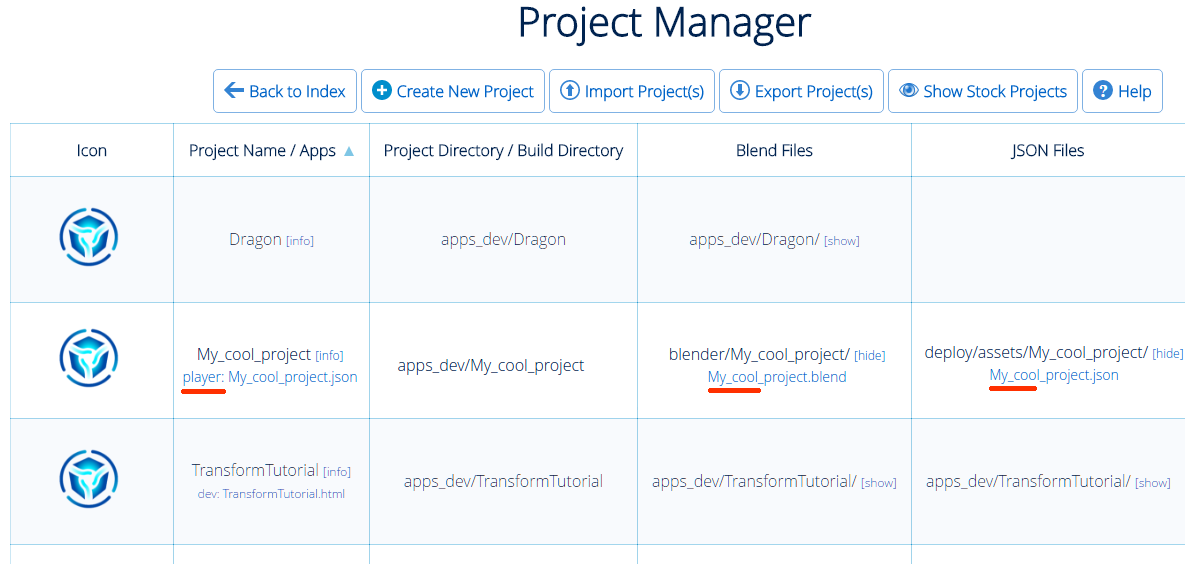
So, our project has been created, and now proudly resides in the Project Manager list. Let’s see what you can do with it.

First. You can open the scene you have created in Blender, or you can add a new one to the project folder. The Blend Files column contains all Blender files associated with this particular project. The paths to them are also shown here. Please consider that JSON files should be exported to the folder specified in the JSON Files column.
Second. You can run the Viewer application and check your scene settings right in the browser. You can learn how to work with the Viewer here.
And third. You can view your scene right in Web Player. To do this, click the link placed under the title of your project (in this example, it is "player: My_cool_project.json").
Next time, we will talk about nuances and methods of deploying Web Player JSON applications.

